About a month ago I told you about Mike’s and my latest project. Well here is an update.


August11th
August10th
Do you have any junk food obsessions? You know, processed “edible food-like substances” that you shouldn’t eat at all…
August9th
It may be August, but Summer’s not over yet.
The start of school looms on the humid horizon… but right now, the fruit is still in its peak season, the days are long and hot, and you have at least a few cook-outs ahead of you before Summer 2010 stamps its timecard.

And with Hubba Bubba’s parents in town from Philadelphia, we decided to have everybody over for some grillin’.
As usual, Mike and I split up the cooking duties, with him playing grill-master and me running point on side dishes and dessert. And we both pitched in for the appetizers.
He’s so fancy, y’all. He made the most beautiful antipasto plate (I failed to get a photo. Something about hosting 14 people makes me forget to take pictures.) with melon, sweet red peppers that he roasted himself, parmigiano reggiano, proscuitto, and capicola (or “gah-bah-gool” as those Philadelphia Italians call it).
And you know what else that stinker did? He made chicken liver crostini, just like what he ate in Florence. (That’s “he,” not “we.” I once ate a chicken liver on accident, thinking it was something else, and it was like a can of Fancy Feast had exploded into every corner of my mouth. No more.) Anyway, maybe HE should write the next “fancypants” blog post.
You know what my appetizer was? Chips and salsa. No joke. Open bag. Open jar. Pour into serving dishes. “Here.”

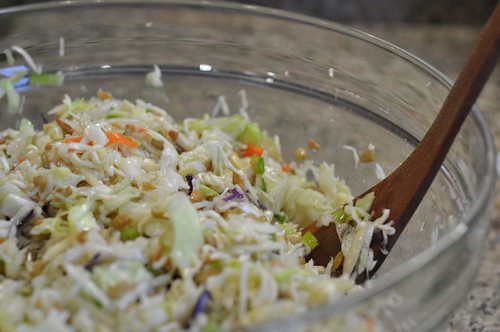
While Fancy Nancy went on to prepare his famous ribs, I made up two side dishes that are decidedly un-fancy and that require very little work: potato salad and brother-in-law Dan’s Ramen noodle slaw.

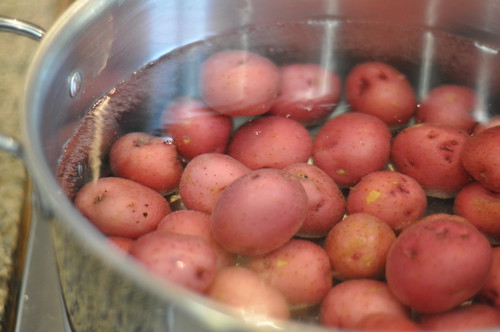
The potato salad can and should be done in advance, which is perfect when you’re entertaining. You make it before your guests come over, stick it in the fridge, and then you have the time and mental bandwidth to calmly offer your guests a drink when they arrive, without feeling like a harried psycho as you hang sweatily over your hot stove. Win-win.
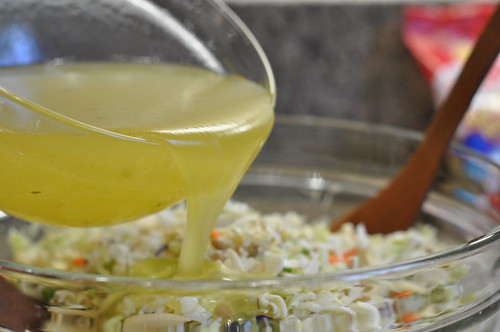
The Ramen noodle slaw is great too. You can make up the dressing earlier in the day, leave it on your countertop (covered with plastic wrap), and then it takes you about 1 minute to assemble the salad and stir the dressing in when you are about to serve dinner.
Also, both of these side dishes are cold, which is so nice on a hot August day. So if you are planning to entertain in August, or you have a potluck to attend, here are two winners. After all, you know I am not in the business of steering you wrong. 😉

And if you want your summer party to be truly top-notch, I suggest you enlist some live entertainment. We were fortunate enough to book Uncle Josh and my nephew Liam, who broke it down for us on the acoustic guitar.

Photo courtesy of Tim Duffy
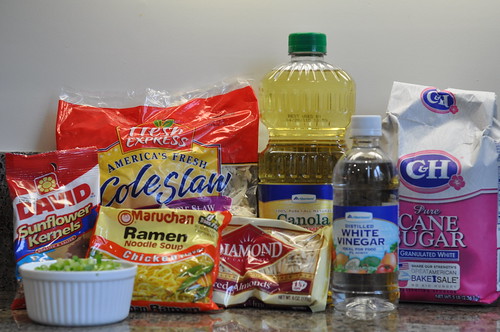
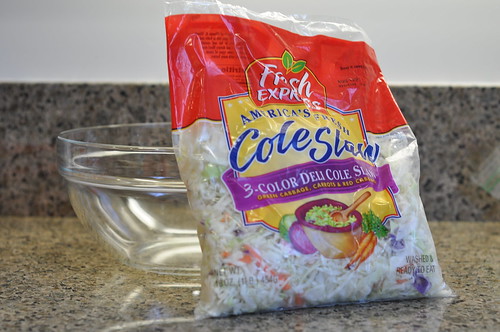
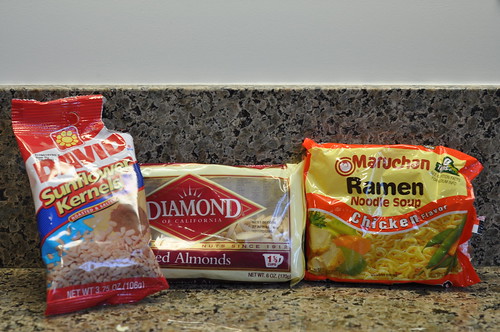
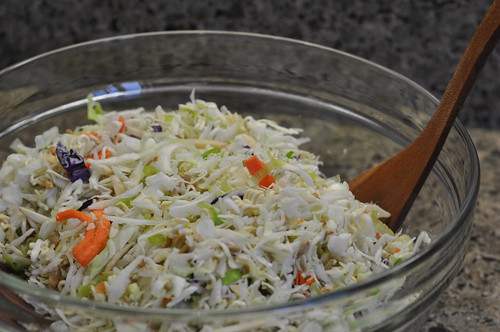
DAN’S RAMEN NOODLE SLAW
1 bag multicolor cole slaw mix
1/2 C toasted almonds (I used slivered. You could also use cashews.)
1/3 C sunflower seeds
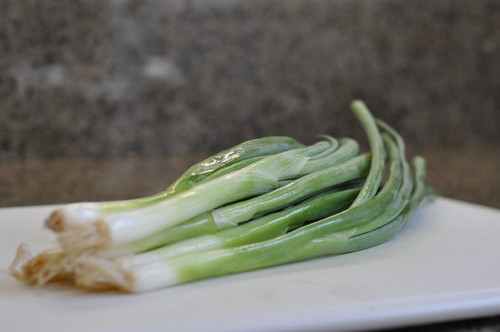
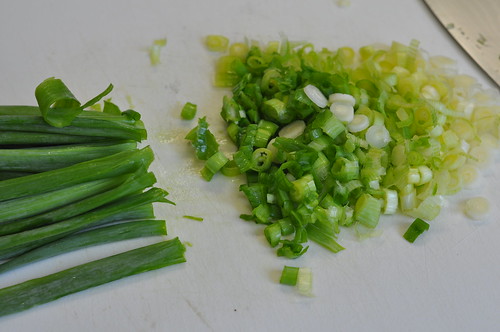
1 bundle green onion, finely chopped
1 package Ramen noodles (chicken flavor), broken up into small pieces
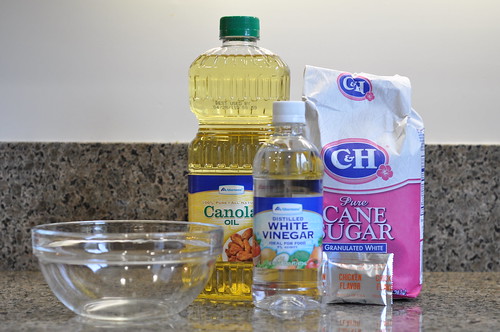
1/2 C vegetable or canola oil
1/3 C white vinegar
1/2 C granulated sugar
1 Ramen noodle seasoning packet
Combine cole slaw, almonds, sunflower seeds, green onion, and Ramen noodles in a large bowl. (You can adjust the amounts however you want — the above amounts are estimates of what I did.) In a separate smaller bowl, combine oil, vinegar, sugar, and seasoning packet, whisking together. Microwave for about 20 seconds in order to melt the sugar a little. Whisk vigorously until the dressing becomes viscous and well emulsified. Just before serving, pour the dressing over the slaw mix and toss together until well combined. You may not need to use all the dressing, so do a little at a time according to your taste.
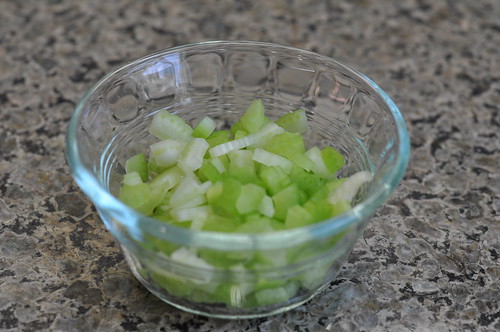
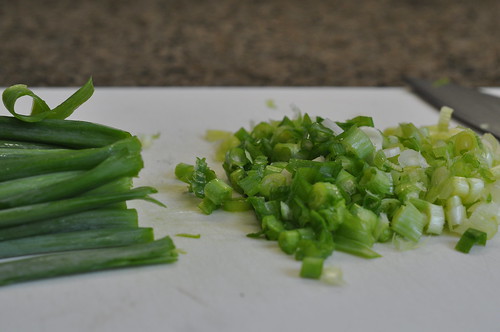
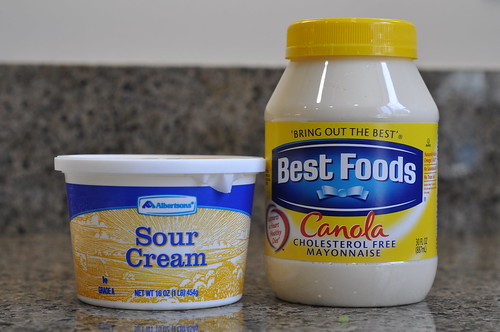
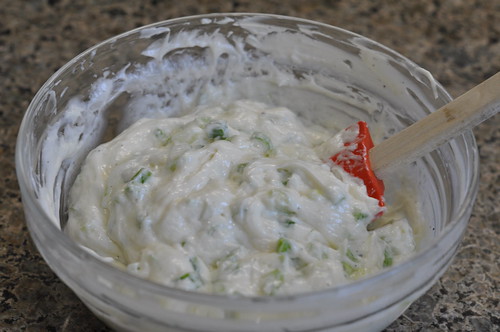
SOUR CREAM REDSKIN POTATO SALAD
2-3 pounds redskin potatoes
1 C mayonnaise
1 C sour cream
1 stalk celery, finely diced
about 1/5 of a green bell pepper, finely diced
1 bundle (or less) green onion, chopped
Salt & pepper to taste
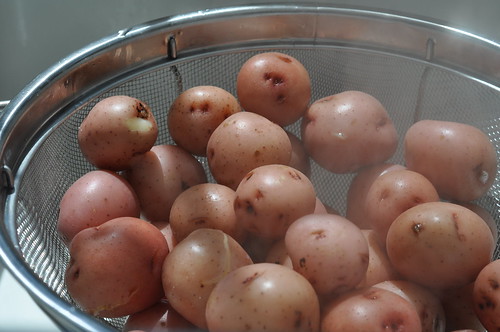
Place potatoes in a large pot and fill with enough cold water to cover them. Salt your water, then bring to a boil. Reduce to a simmer and cook for about 15-20 minutes until potatoes are tender when pierced with a fork. Drain and allow to cool slightly.
Combine mayonnaise and sour cream in a small bowl. Add celery, bell pepper, and onion and mix well. Salt & pepper to taste, although you should be somewhat generous.
When potatoes are cool enough to handle, cut into bite-size pieces and place in a large bowl. I added salt here as well. Add your mayonnaise mixture, stirring in gradually (in case you decide you don’t want to use all of it), to the slightly warm potatoes. Transfer to your serving bowl, cover, and refrigerate until ready to serve.
For you Lexingtonians and Lexingtoniennes, this was my attempt to imitate Stanley J’s potato salad, and I came really close. I used equal amounts of mayonnaise and sour cream, but next time I might try more sour cream than mayonnaise. Just FYI. 🙂
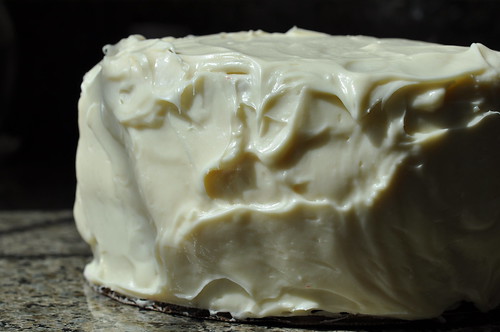
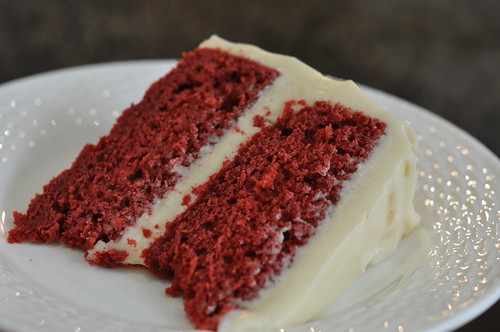
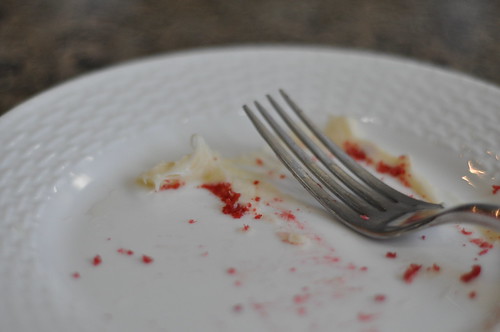
And of course for dessert there was red velvet cake.
Have a great week!
![]()
P.S. Happy Birthday, Mary Beth!
August6th
Every year on Mike and Tim’s birthday (Did you know that Hubba Bubba is a twin?), I take it totally upon myself — with no request from the boys, who are probably baffled at my endeavors and who actually prefer fruit pie — to make them a birthday cake.
And for some reason, y’all, I am terrible at it. I can make some pretty mean cookies, pies, cobblers, crumbles, brownies, quick breads, and even Bundt cakes… but when it comes to cake-cake — standard, birthday-style cake with layers and frosting — wah wahhhhh.
The first year I tried to make them a cake, I attempted a chocolate cake with buttercream frosting. Several late-night attempts, about seven phone calls to Mimi, one very slumpy cake and several days later, I realized the baking soda I had just purchased was already expired. [Lesson 1: Check the expiration date on everything before you buy it.] To add insult to injury, I stupidly bought the cheapest icing decoration set I could find, and as a result, “Happy Birthday Mike & Tim” looked like I had piped it while having a seizure on a roller coaster. FAIL.
The next year, feeling utterly incapable, I used a white cake mix that I doctored a little with some almond extract. I layered the white cake with store-bought lemon curd, then frosted it with store-bought white frosting and threw some coconut shreds at it. It was actually pretty good, but it didn’t count because it was so… store-bought. The shame.
Another year I gave up altogether (much to the boys’ pleasure, I’m sure, as they still have no idea why I’m on this hellbent cake-making mission) and made a mixed berry pie. Pie WIN. Cake FAIL.
And finally last year, at Tim’s request, I made an angel food cake with chocolate frosting. The angel food cake was from a mix and it still didn’t turn out great. What is WRONG with me?! And the frosting recipe said to use cocoa powder for the chocolate. Bad idea. I should have known that the only way to go is to melt chocolate squares. I was so embarrassed to serve that sorry excuse for a birthday cake. FAIL. FAIL. FAIL.
Well this year, I am going to make that dang birthday cake and I’m going to get it right. So I decided to start practicing now — in August — for the December 6 birthday. Reason #1 for cake.
Also, a few weeks ago, my friend Erin emailed me asking for a post about red velvet cake. And since my Best Friend Jenny used to make red velvet cake at the bakery where she worked in college, I knew just where to find a great recipe. Reason #2 for cake.
There’s also the fact that I run 2-3 times a week, go to Bar Method 3-4 times a week, and in spite of these Herculean efforts, there’s no way around it: I’m just getting fatter. Yes yes, I know that’s part of being pregnant. But seriously, if I weren’t pregnant and I were doing this work out regimen, I’d look like a freaking gazelle by now. So some days you just feel like giving up. Screw it – let’s get fat! Reason #3 for cake.
Today is Friday. Reason #4 for cake.
My in-laws are in town. This means there are people around to help eat said cake. Reason #5 for cake.

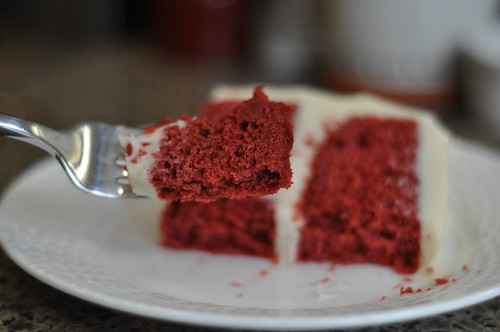
And, having tasted it (strictly for research purposes, obvi), I can tell you that I FINALLY did it. I made a cake. And it is good, even though it is not shaped like an armadillo. OK second bite… Yep. Yep, it is definitely REALLY GOOD. THANK YOU, Erin, for the red velvet cake request, and THANK YOU, Best Friend Jenny, for this kick-ass recipe!!! Finally, the Cake Chump becomes a Cake Champ!
You should make it too. 🙂
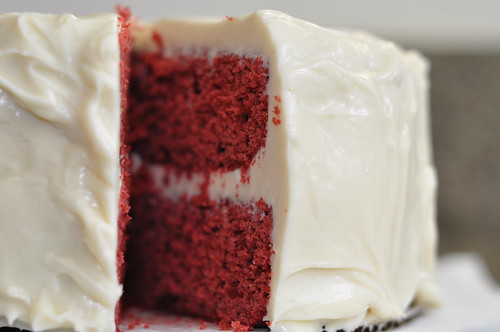
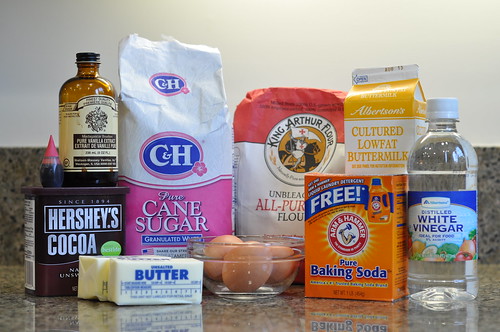
RED VELVET CAKE
Adapted from Squilley’s Bakery recipe
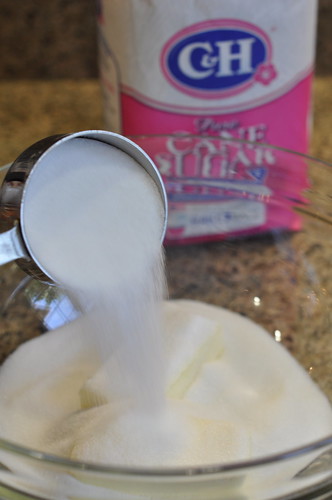
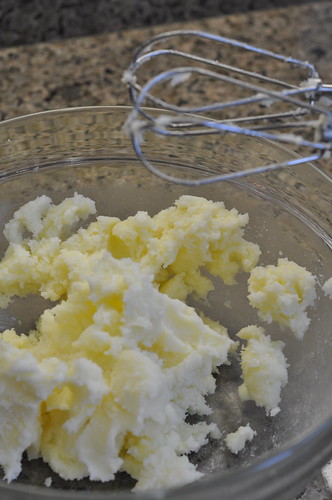
2 sticks unsalted butter
1 1/2 C sugar
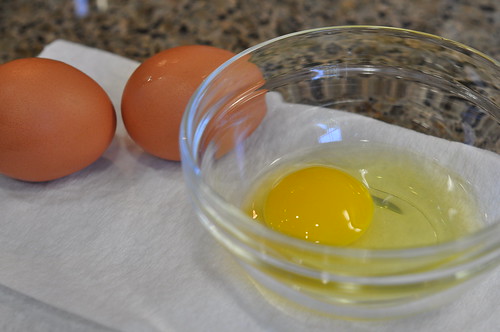
3 eggs
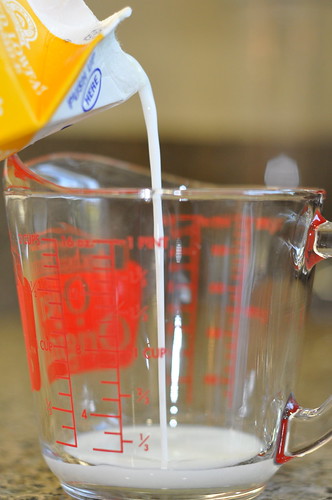
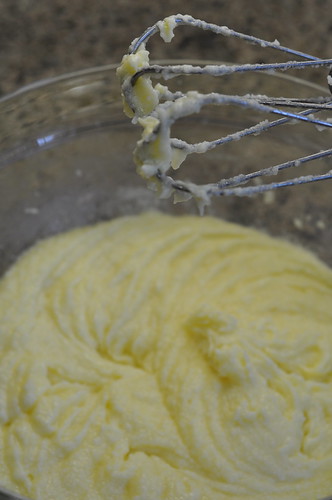
1 C buttermilk
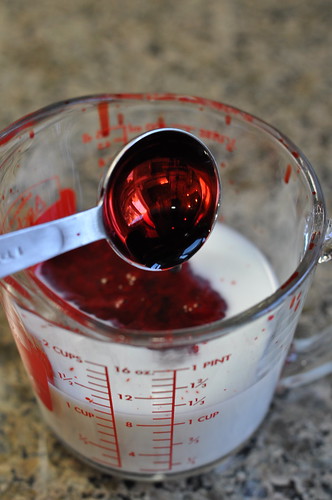
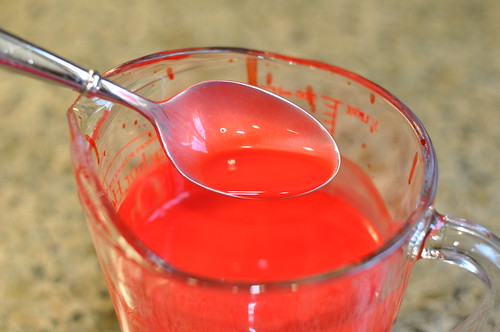
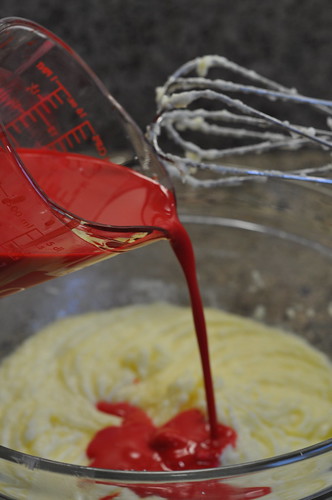
1 T red food coloring
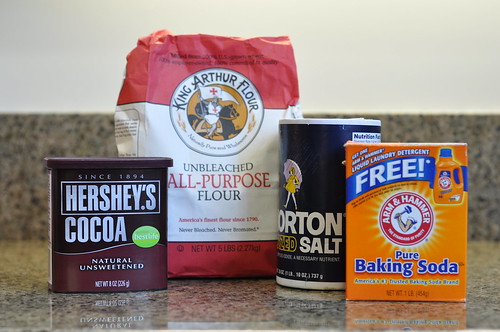
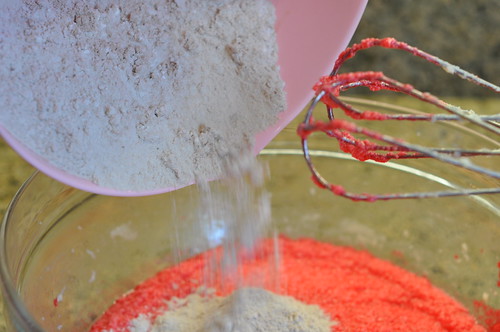
2 1/2 C all-purpose flour
2 T unsweetened cocoa powder, sifted {measure it out and then sift it to make it lump-free}
1 t baking soda
1/2 t salt
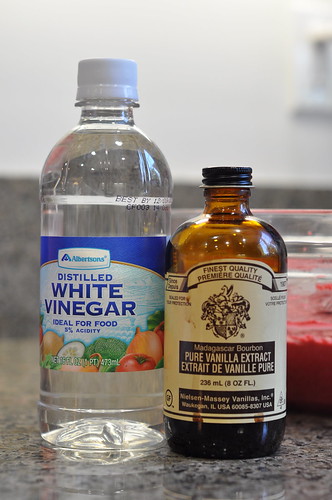
1 t vanilla extract
1 T white vinegar
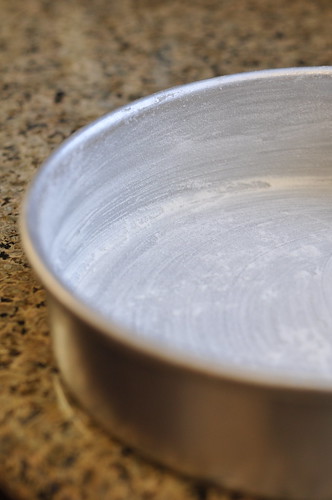
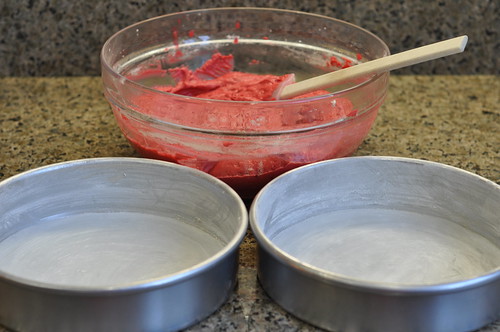
Preheat oven to 325. Grease (I use Crisco — get over it) and flour two 8-inch round cake pans and line the bottoms with parchment rounds.
Combine buttermilk and food coloring and set aside.
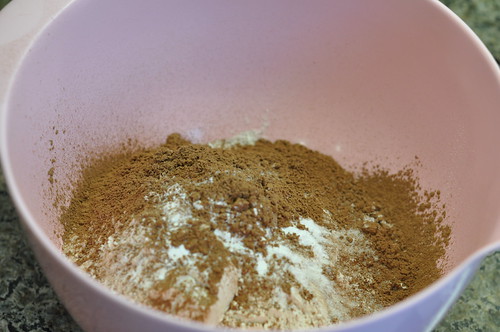
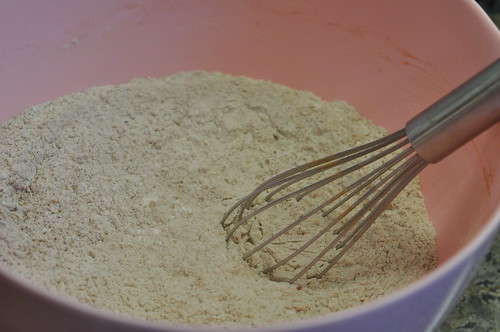
Combine flour, cocoa powder, baking soda, and salt and set aside.
In a large mixing bowl, cream together butter and sugar. Add eggs one at a time. Alternate adding the buttermilk and the dry ingredients, doing about 1/3 at a time and mixing well after each addition. (But do not overmix with flour ever. Make sure it’s well combined and then stop. Otherwise you will overstimulate the gluten and your cake will be tough.) Beat in vanilla and vinegar until well combined.
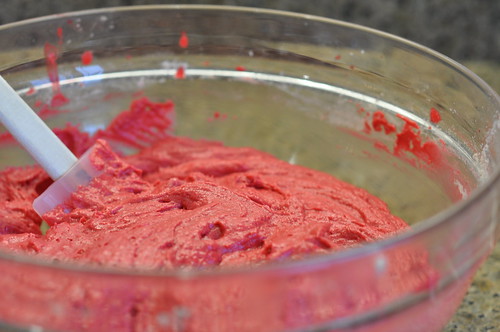
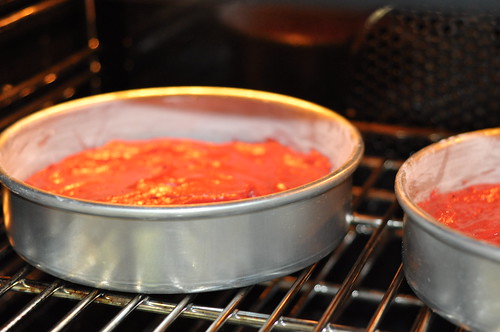
Pour the batter into the two pans and bake for about 35 minutes, or until a toothpick inserted in the center comes out clean or with just a few crumbs on it.
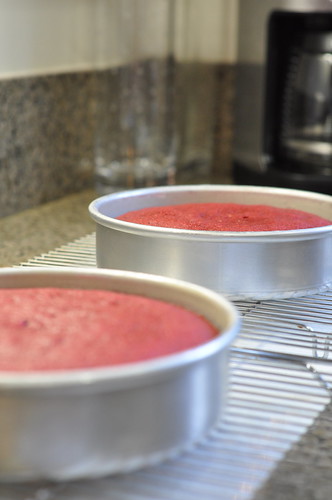
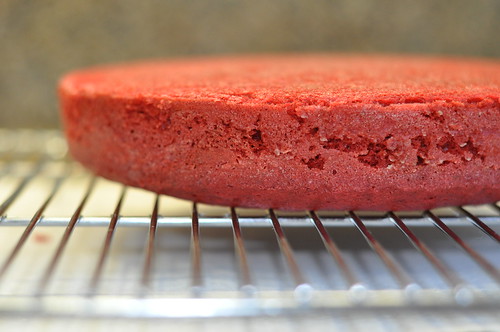
Cool the cakes for about 10 minutes on a rack in the pans. Then gently slide a knife about the perimeter of the pans, invert, and your cakes should slide right out. Remove the parchment paper rounds from the tops of the cakes. Cool completely on a rack before frosting.
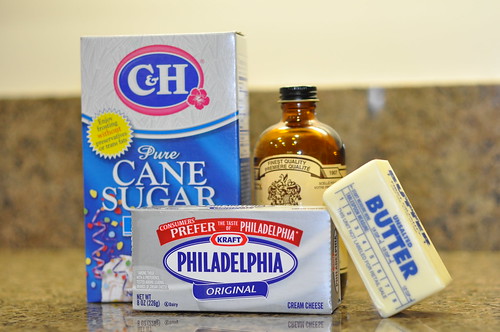
CREAM CHEESE FROSTING
Adapted from the Joy of Cooking
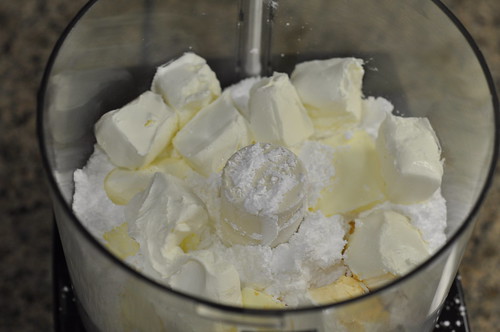
8 oz cream cheese, cold
5 T unsalted butter, at room temperature
2 t vanilla
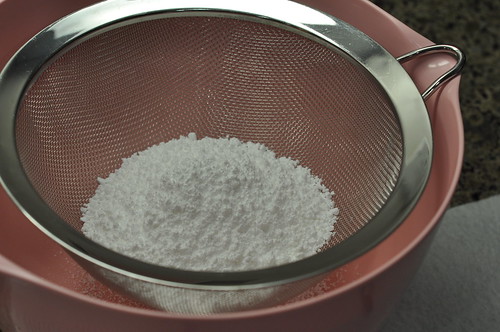
2 C powdered sugar, sifted {measure and then sift to get any lumps out}
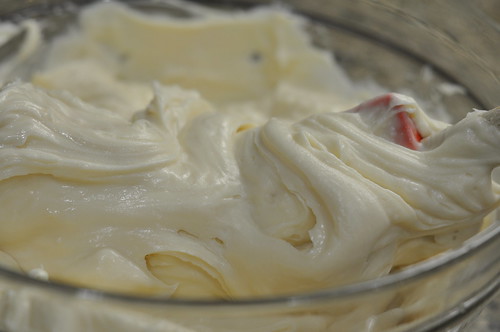
Combine in a food processor and pulse until smooth and creamy. Do not overmix, as overbeating breaks down the cream cheese. If you don’t have a a food processor, you can do this with a hand mixer. Beat the first three ingredients just until blended, then add the sugar about 1/3 at a time, beating until smooth.
I tripled this recipe for my red velvet cake and had a little left over, which I kept for dipping strawberries in — duh.
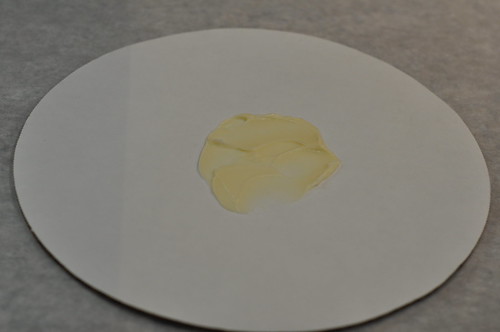
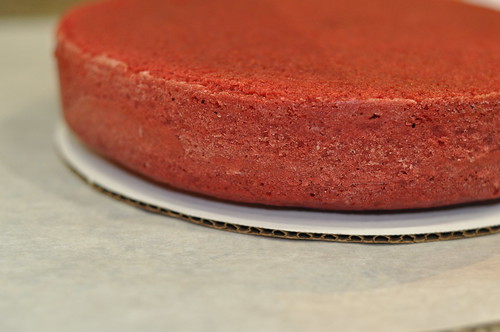
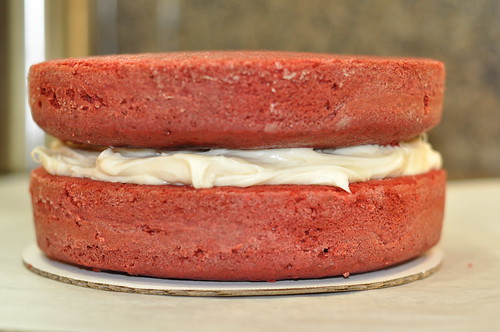
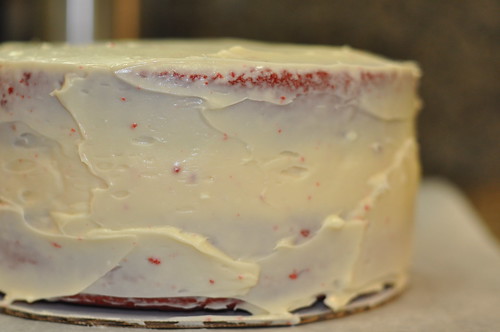
I bought an 8-inch cardboard cake round at a kitchen supply store to set my cake on. Smear a small dollop of frosting onto the cardboard to keep your cake from moving around. Set one cake layer on top of the cardboard round, frost the top for your center layer of frosting, then place your second cake layer upside-down on top of it (this will give you a nice flat top for your cake). Apply a very thin coat of frosting to the top and sides of the entire cake. This is called a crumb layer and it doesn’t need to look pretty. Once you have applied the crumb layer, pop the cake into the fridge for 20-30 minutes for the crumb layer to set. Then remove from the fridge and generously frost the cake.
I’m not sure what the experts recommend — online opinions are mixed — but I’m storing my cake in the fridge since the frosting is mainly cream cheese.
Hooray! I made a cake!
xoxo,
![]()